Samba share is on NTFS formatted Transcend 25M3 2.5″ 2TB USB3 external drive. On Celeron N3050 it’s connected to the USB 3.0 port and served through Intel Gigabit Pro/1000 CT Desktop PCI-E network adapter.

Samba share is on NTFS formatted Transcend 25M3 2.5″ 2TB USB3 external drive. On Celeron N3050 it’s connected to the USB 3.0 port and served through Intel Gigabit Pro/1000 CT Desktop PCI-E network adapter.
Microsoft supplied NFS client is available only in the Enterprise and Ultimate Windows editions. In this article I’ll explain how to setup and run NFS server on the Raspberry Pi 3 computer running Raspbian operating system and connect to it from Windows 10 Home client (everything should work with other Windows versions and editions).

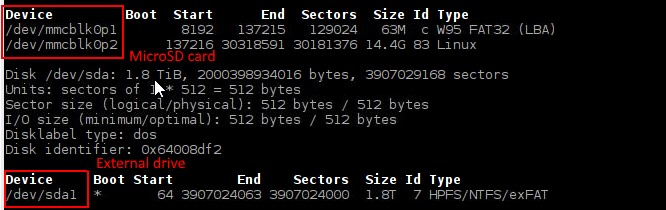
Connect disc to the Raspberry Pi and run command fdisk -l. Check the name your drive got:
Create mounting point:
sudo mkdir /media/transcend
Connected drive is NTFS formatted, so we make sure that NTFS read – write driver is installed:
sudo apt-get update

sudo apt-get install ntfs-3g
Add this entry to the /etc/fstab file:

Restart Raspberry Pi and create a new folder where you’ll keep your NFS share:
mkdir /media/transcend/NFS
Install:
sudo apt-get install nfs-common nfs-server
Add this entry to your /etc/exports file:
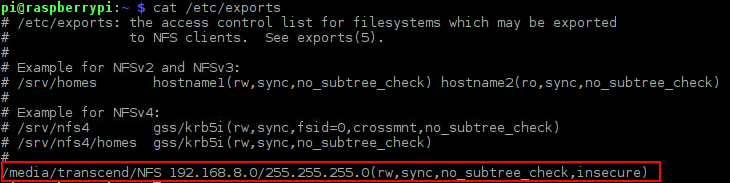
192.168.8.0/255.255.255.0 means that NFS server will accept connections from local IP addresses in range of 192.168.8.1 – 192.168.8.254. Option insecure is added because otherwise Windows clients can’t connect.
Download NFS Windows client binaries from here.
Extract them and follow these steps:
mkdir C:\etc
copy etc_netconfig C:\etc\netconfig
copy ms-nfs41-idmap.conf C:\etc\
bcdedit /set testsigning on

nfsd_debug.exe --noldap --uid 1000 --gid 1000 -d 3
nfs_mount.exe Z: 192.168.8.103:\media\transcend\NFS
where 192.168.8.103 is Raspberry Pi IP address.
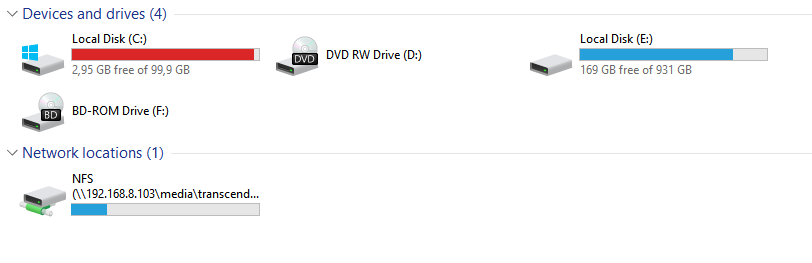
It works:
If trying to mount NFS share you are getting similar error:

but NFS server is running and restarting it
sudo /etc/init.d/nfs-kernel-server restart
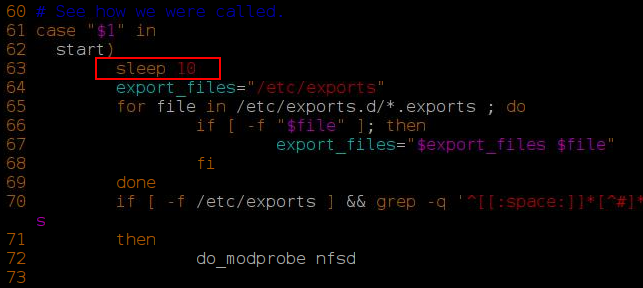
fixes the problem, it’s possible that nfs-kernel-server is starting earlier than external drive is mounted. To fix this you can delay nfs-kernel-server starting for, say 10 seconds, by editing /etc/init.d/nfs-kernel-server file and adding sleep 10 line after start section:
If you made sure that everything is running, run command line as administrator, return to extracted NFS client folder and install NFS client as a service:
nfsd.exe -install
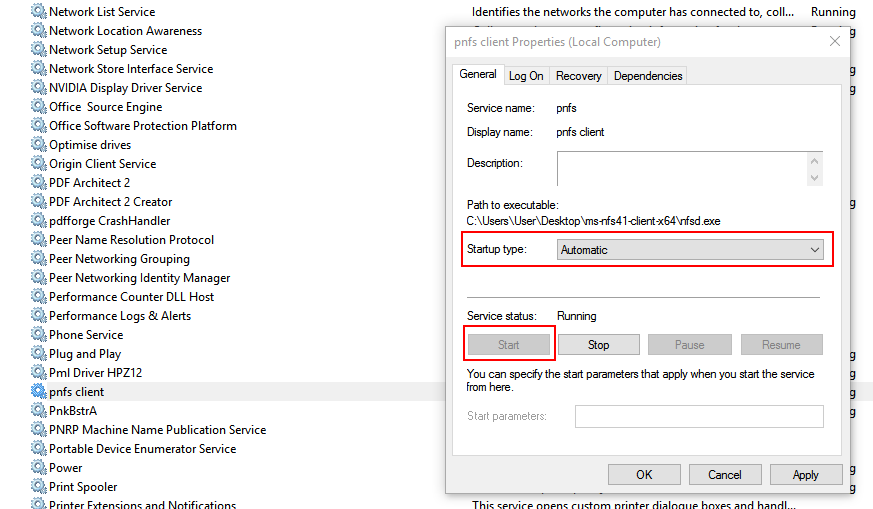
Then run services.msc, find pnfs client entry and change its startup type to automatic:
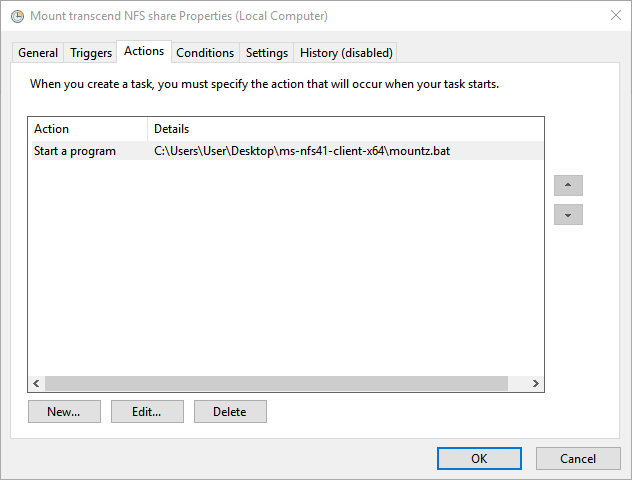
To auto-mount NFS share, run Task Scheduler tool, in the left pane select Task Scheduler Library and create a new task by clicking Create Task in the right pane. Give your task a name, in the Triggers tab create a trigger which will run on system startup with 30 seconds delay, in the Actions tab create Start a program action, which will point to a script with similar command:
C:\Users\User\Desktop\ms-nfs41-client-x64\nfs_mount.exe Z: 192.168.8.103:\media\transcend\NFS
In the Conditions tab remove the check from start the task only if computer is on AC power.
Press OK.
Next time you restart your Windows PC, NFS client will run and mount NFS share automatically.
There seems to be only one way to feed live video from Boscam HD19 FPV camera to Raspberry Pi over wire. To do that you’ll need composite AV to USB capture card. The one I had lying around is called KWorld VS-USB2800D Composite/S-Video to USB 2.0 (see Pic 1 and 2).

Pic 1. KWorld VS-USB2800D front side

Pic 2. KWorld VS-USB2800D back side
Connect Boscam camera to capture card with supplied mini USB to composite AV cable. Insert supplied multifunctional port’s power cable and connect it to 12 V battery (as per Boscam’s specification). I used Turnigy 3S 11.1 V battery which seems to do the job. See pics bellow.

Pic 3. Boscam HD19 with composite and power cables connected

Pic 4. Turnigy 3S 11.1 V battery

Pic 5. Everything’s connected
Connect capture card to Raspberry’s USB port (Pic 6).
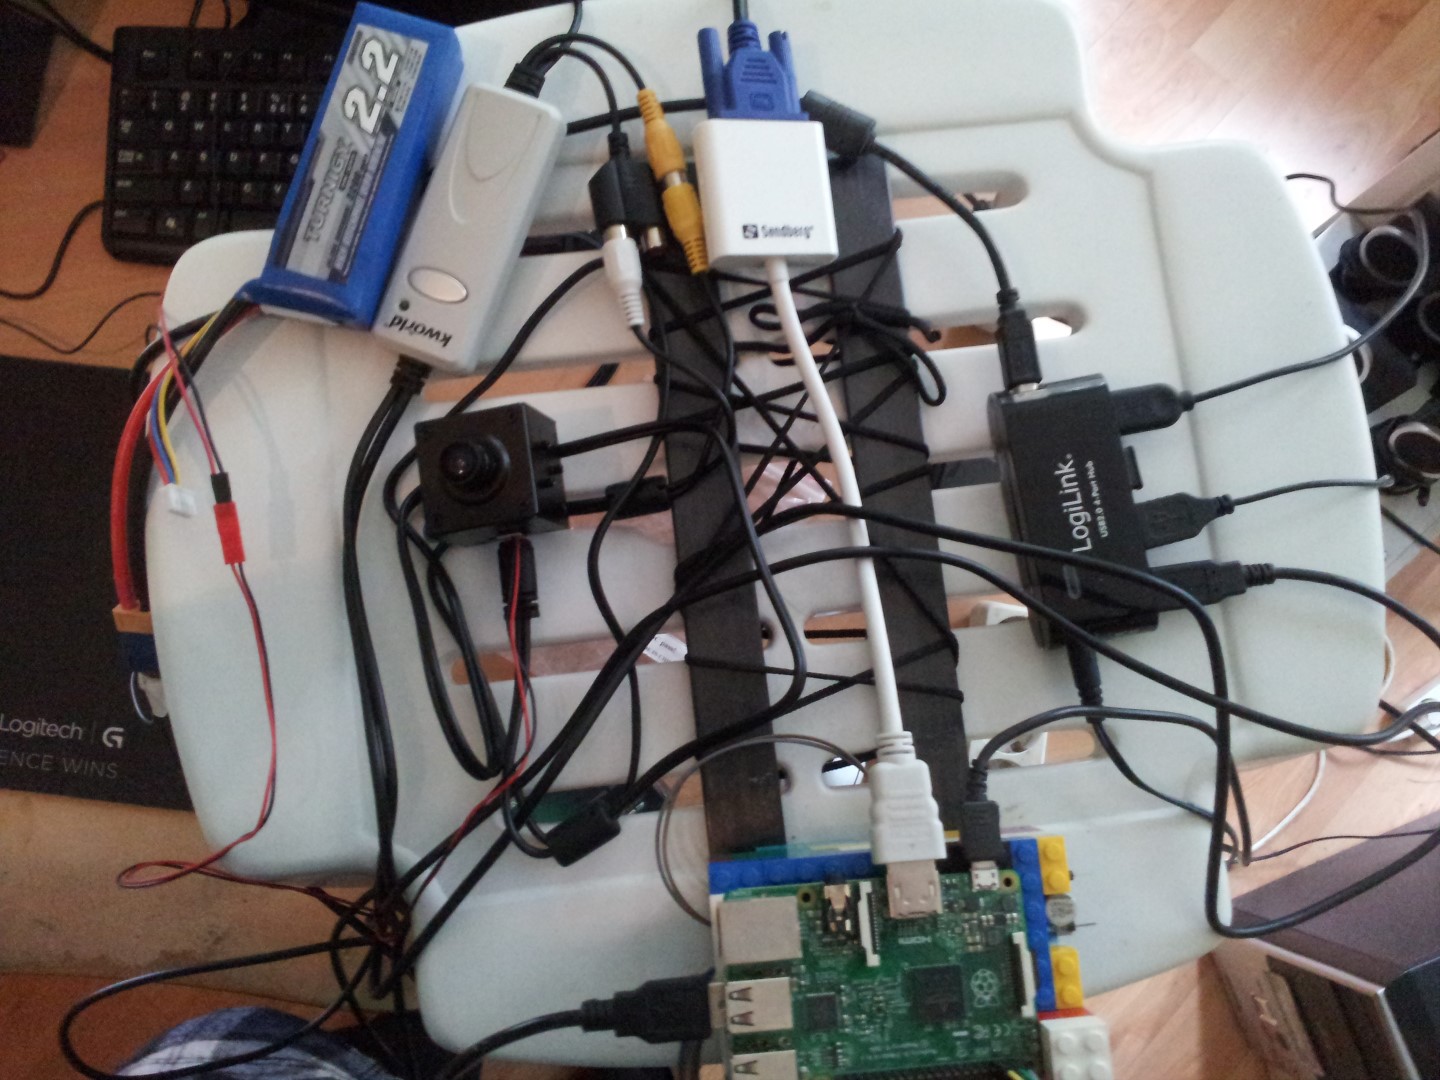
Pic 6. And… It’s a mess
Turn on your Boscam camera by holding its power button and start Raspberry. If you’re lucky Raspberry will detect your capture card on boot and it’ll be ready to use. You can quickly test it with software like guvcview. You can find an incomplete list of supported devices here.
In my case, even though everything was detected, all I got was black screen. The problem was that KWorld’s capture card has two inputs: S-Video and composite and it defaults to using S-Video.
To fix this I listed available channels:
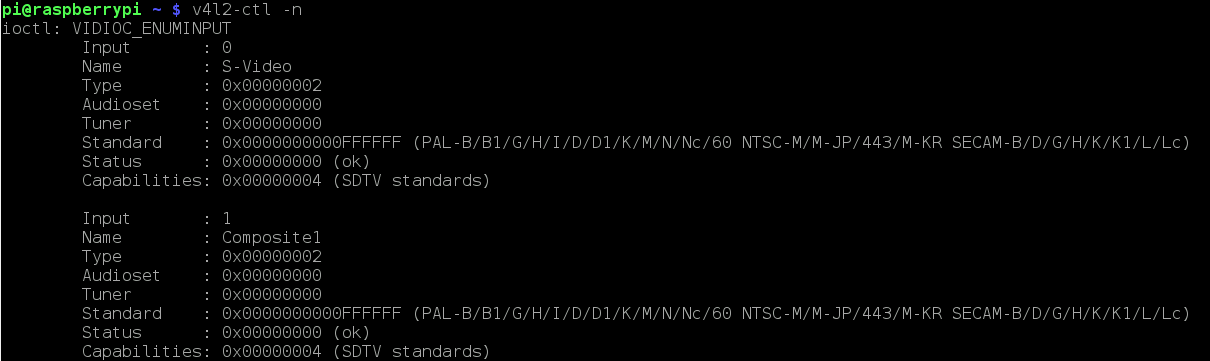
Pic 7. Listing available channels
and selected composite channel:
Pic 8. Selecting channel
It works!
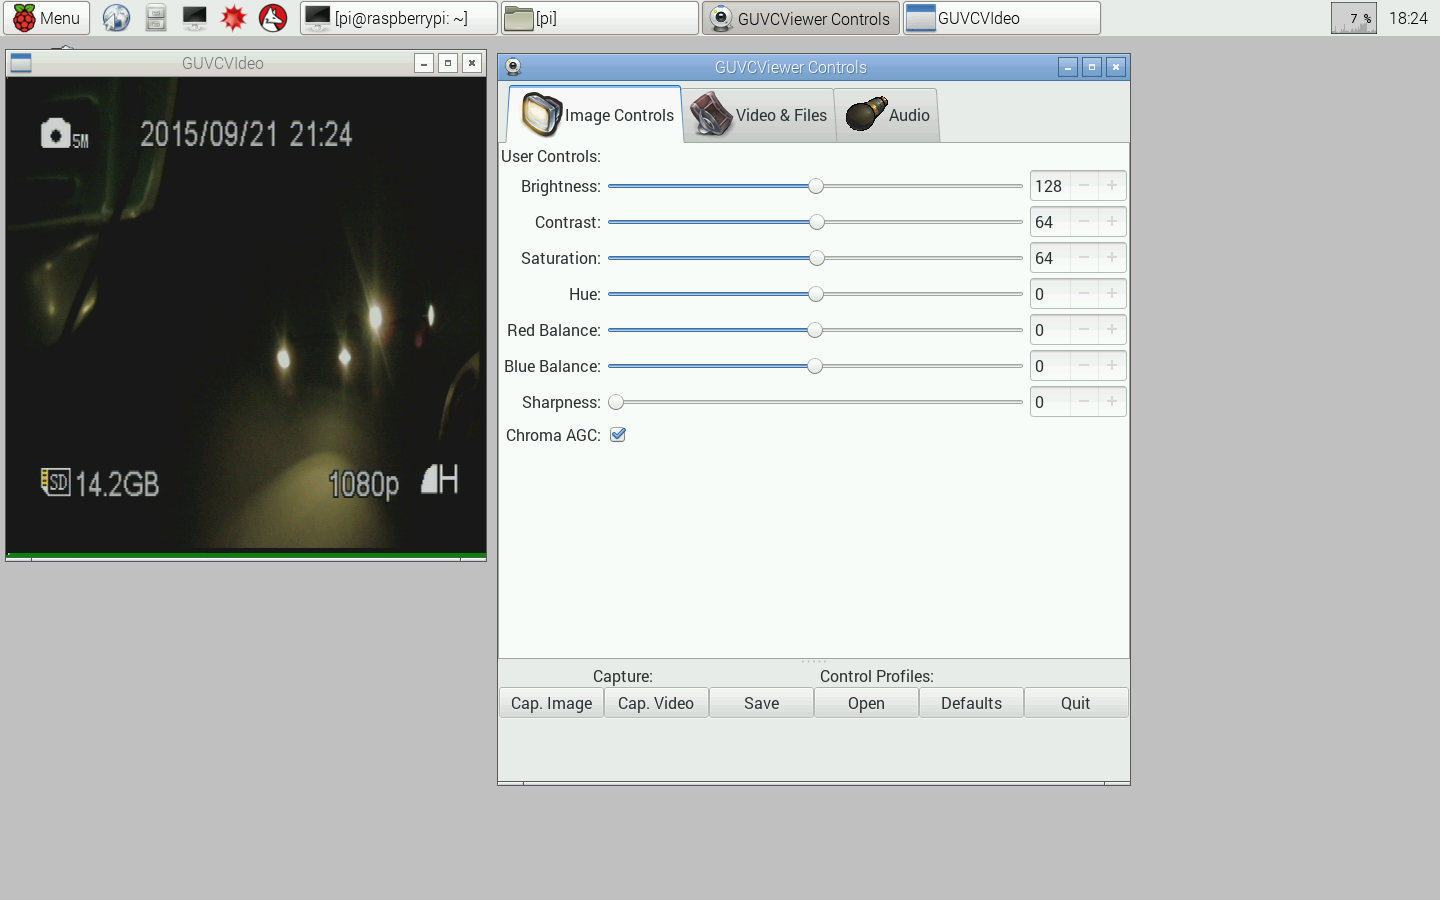
Pic 9. guvcview works